The Best Homemade Cherry Cobbler Recipe
Recipe
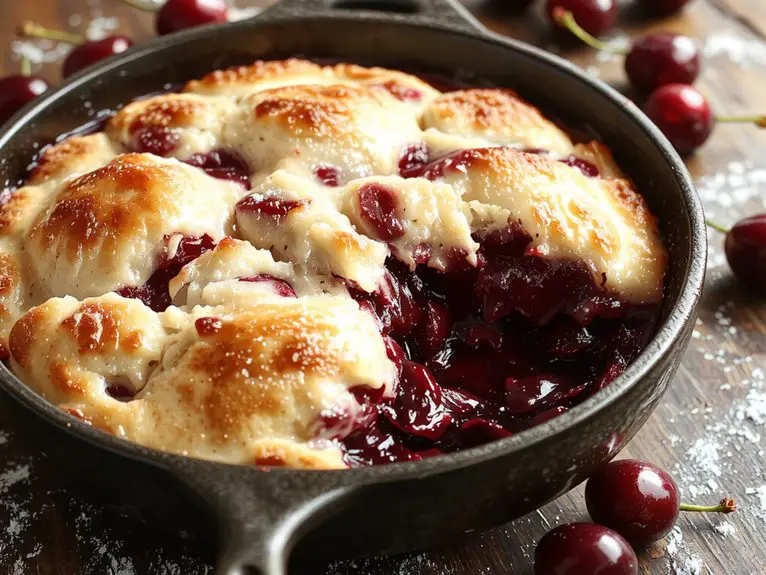
If you’re looking for a dessert that’s equal parts comforting, indulgent, and downright irresistible, this homemade cherry cobbler is your answer. Trust me, I’ve made this recipe more times than I can count—and every single time, it’s a showstopper.
The secret? Juicy, sweet-tart cherries bubbling beneath a tender, golden biscuit topping that’s crispy on the outside and soft on the inside. Fresh cherries are fantastic, but even frozen ones work wonders here, making this a year-round treat.
What I love most is how simple it is—no fancy techniques, just good ingredients coming together in the most delicious way. Warm from the oven, with a scoop of vanilla ice cream melting over the top, this cobbler is pure perfection.
Whether it’s a cozy family dinner or a summer potluck, this dish will have everyone asking for seconds—and the recipe. Go ahead, give it a try; it’s easier than you think and tastes like a hug in dessert form.
Ingredients
The secret to a perfect homemade cherry cobbler lies in choosing the right ingredients.
Fresh, seasonal cherries bring the best flavor, but frozen cherries work beautifully too—just make sure they’re unsweetened to control the sweetness of your dish.
A pinch of almond extract adds a subtle depth that complements the cherries perfectly, while a buttery, flaky biscuit topping ties it all together.
- Fresh or frozen cherries – Fresh works best in season, but frozen is a great year-round option.
- Granulated sugar – Balances the tartness of the cherries.
- Cornstarch – Thickens the filling without making it gloopy.
- Almond extract – Adds a nutty richness that pairs beautifully with cherries (vanilla works as a swap).
- Lemon juice – A splash brightens the flavor.
For the biscuit topping:
- All-purpose flour – The base for a tender, flaky topping.
- Baking powder and salt – Guarantee the topping rises perfectly.
- Unsalted butter – Cold butter is key for that flaky texture.
- Milk or buttermilk – Buttermilk adds a slight tang, but whole milk works too.
- Turbinado sugar (optional) – Sprinkle on top for a crunchy, golden finish.
Non-negotiables: Fresh cherries (or high-quality frozen ones) and cold butter for the topping. Trust me, these make all the difference!
How to Make the Best Classic Cherry Cobbler Method
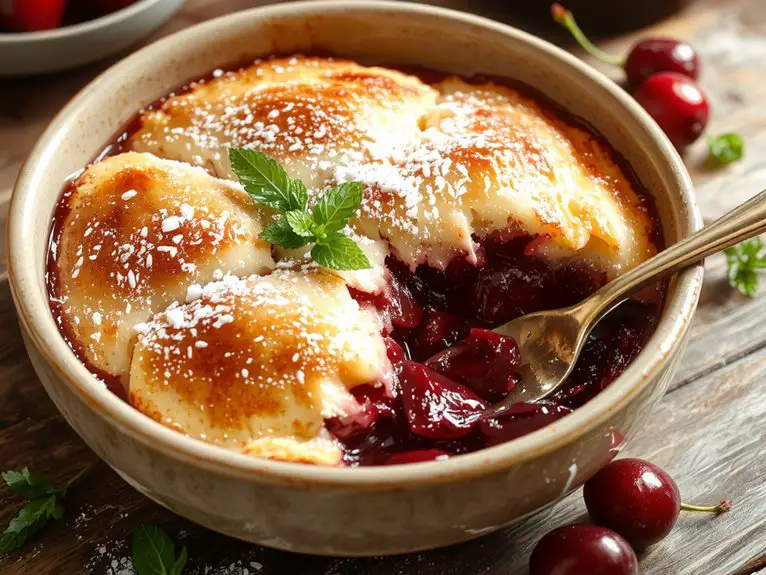
- Preheat the oven to 375°F (190°C)—this guarantees it’s ready when your batter is prepared. Grease a 9×9-inch baking dish or similar size with butter or nonstick spray to prevent sticking.
- Prepare the cherry filling: In a mixing bowl, combine 4 cups of fresh or frozen cherries, ¾ cup granulated sugar, 2 tablespoons cornstarch, and 1 teaspoon vanilla extract. Gently toss until the cherries are evenly coated. The cornstarch helps thicken the juices as it bakes.
- Make the cobbler batter: In a separate bowl, whisk together 1 cup all-purpose flour, ½ cup granulated sugar, 1 ½ teaspoons baking powder, and a pinch of salt. In another bowl, mix ½ cup milk, 4 tablespoons melted butter, and 1 teaspoon vanilla extract. Gradually add the wet ingredients to the dry ingredients, stirring just until combined. Overmixing can lead to a dense batter, so stop as soon as no streaks of flour remain.
- Assemble the cobbler: Pour the prepared cherry filling into the greased baking dish. Drop spoonfuls of the batter evenly over the cherries—don’t worry about spreading it perfectly, as it will spread and rise as it bakes. This creates a rustic, cobbled texture.
- Bake for 40-45 minutes: Place the dish in the preheated oven and bake until the topping is golden brown and the cherry filling is bubbly. If the topping browns too quickly, loosely cover it with foil to prevent burning while the filling bakes through.
- Cool slightly before serving: Let the cobbler sit for about 10 minutes after baking. This allows the filling to set slightly, making it easier to serve. Pair it with a scoop of vanilla ice cream or a dollop of whipped cream for the perfect finish.
Nutrition
Cherry cobbler is a delicious dessert that also provides essential nutrients. Below is the nutritional breakdown per serving.
| Calories | Fat | Carbs | Protein | Sugar |
|---|---|---|---|---|
| 320 | 12g | 49g | 4g | 35g |
Chef Tips
I’ve found that making cherry cobbler isn’t just about the ingredients—it’s about technique. Use fresh cherries for the best flavor, but frozen work too; just thaw and drain them.
Don’t overmix the batter; it should be lumpy. Bake until the top is golden and the filling bubbles.
Let it cool slightly before serving to avoid a runny texture. A pinch of cinnamon enhances the flavor beautifully.
Frequently Asked Questions
Can I Use Frozen Cherries Instead of Fresh?
Absolutely, I can use frozen cherries instead of fresh. They’re just as good and often more convenient. I’ll just thaw and drain them first to avoid extra moisture, ensuring my cobbler turns out perfectly.
How Do I Store Leftover Cherry Cobbler?
I’d store leftover cherry cobbler in an airtight container or cover it tightly with foil. I’d keep it in the fridge for up to 3 days, or freeze it if I want it to last longer.
Can I Make This Recipe Gluten-Free?
Yes, I can make this recipe gluten-free! I’ll just swap the regular flour for a gluten-free alternative and verify the other ingredients, like oats if used, are certified gluten-free. It’s an easy adjustment.
What’s the Best Way to Serve Cherry Cobbler?
I’d serve cherry cobbler warm with a scoop of vanilla ice cream or a dollop of whipped cream—it melts perfectly into the cobbler. Sometimes I add a sprinkle of cinnamon or fresh mint for extra flair.
Can I Use a Different Type of Fruit?
Yes, I can totally use a different type of fruit—it’s super flexible! I’ve tried peaches, berries, and apples, and they all work. Just keep the sugar balanced since some fruits are sweeter or tarter than cherries.