The Best Homemade Burnt Ends Recipe
Recipe
If there’s one barbecue dish that’ll make you feel like a pitmaster with zero stress, it’s these homemade burnt ends. Trust me, once you sink your teeth into these smoky, caramelized cubes of beef, you’ll wonder why you haven’t been making them all along.
The secret? Quality brisket point, a killer rub, and a slow-and-low cook that transforms the meat into tender, melt-in-your-mouth perfection with a crispy, bark-like exterior.
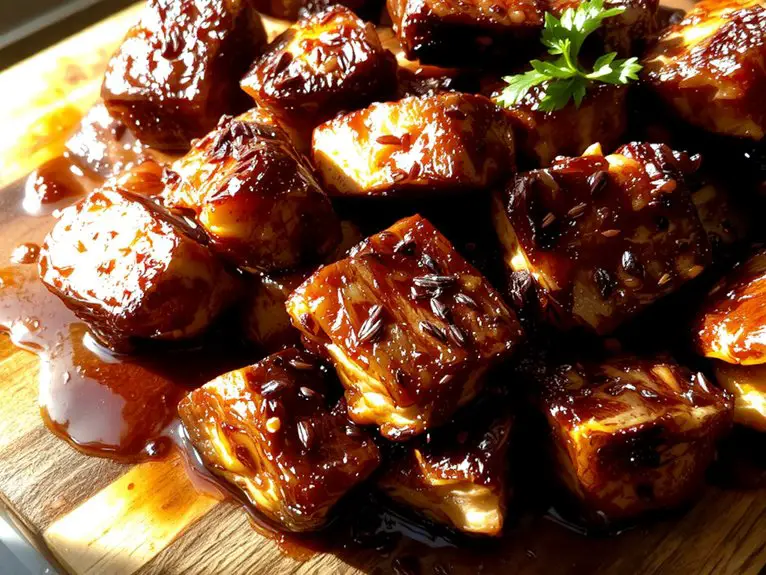
What sets these apart is the final glaze—a sticky, tangy-sweet sauce that’s finger-licking good. Whether you’re firing up the smoker for a backyard feast or just chasing that authentic BBQ flavor, this recipe is foolproof and downright addictive.
Get ready to impress yourself (and everyone else). Let’s get started.
Ingredients
To nail the perfect homemade burnt ends, it’s all about starting with the right ingredients. Quality matters here—especially when it comes to the cut of meat. Below, I’ve broken down everything you’ll need, along with some insider tips to make sure your burnt ends are smoky, tender, and irresistible.
- Beef brisket point: This is the star of the show. The point (or deckle) is fattier than the flat, which makes it perfect for burnt ends. Don’t swap this—it’s essential for that melt-in-your-mouth texture.
- Kosher salt: Coarse grains help season the meat evenly without overpowering it.
- Black pepper: Freshly ground pepper adds a robust, spicy kick.
- Garlic powder: It’s a subtle but necessary flavor enhancer for the beef.
- Onion powder: This adds a sweet, savory depth to the rub.
- Paprika: Use smoked paprika for an extra layer of smokiness.
- Brown sugar: It balances the heat and helps create that delicious caramelized crust.
- Yellow mustard: Acts as a binder for the rub—don’t worry, you won’t taste it!
- BBQ sauce: Go for a thick, tangy sauce. Homemade or store-bought both work, but make sure it’s one you love.
- Beef broth: This keeps the meat moist during the smoking process.
Pro tip: If you’re short on time, pre-made BBQ sauce is fine, but a homemade sauce can elevate the dish to restaurant-quality.
And if you can’t find a whole brisket point, ask your butcher—they’ll often have it separate.
How to Make the Best Best Burnt Ends Recipe
– Prepare the brisket: Start by trimming any excess fat from the brisket, leaving about 1/4 inch for flavor and moisture.
Pro Tip: Use a sharp knife for precision and safety.
Visual Cue: The brisket should look evenly trimmed with a thin layer of fat.
– Season generously: Liberally coat the brisket with a dry rub of your choice, ensuring all sides are covered.
Why: The rub forms a flavorful crust and helps tenderize the meat.
Watch-Out Warning: Avoid rubbing too aggressively to prevent tearing the meat.
– Smoke low and slow: Place the brisket in a preheated smoker at 225°F (107°C) and smoke for 6-8 hours.
Pro Tip: Use wood chips like hickory or oak for a rich smoky flavor.
Visual Cue: The brisket should have a dark bark and an internal temperature of 165°F (74°C).
– Wrap for tenderness: After smoking, wrap the brisket tightly in butcher paper or aluminum foil.
Why: This traps moisture and speeds up the cooking process.
Time-Saving Trick: Pre-cut the wrapping material to save time.
– Continue cooking: Return the wrapped brisket to the smoker or oven until it reaches an internal temperature of 203°F (95°C).
Pro Tip: Use a meat thermometer for accuracy.
Visual Cue: The brisket should feel tender when probed.
– Rest the brisket: Remove the brisket from the smoker and let it rest for at least 1 hour.
Why: Resting allows the juices to redistribute, ensuring moist burnt ends.
Watch-Out Warning: Avoid cutting into the brisket too soon.
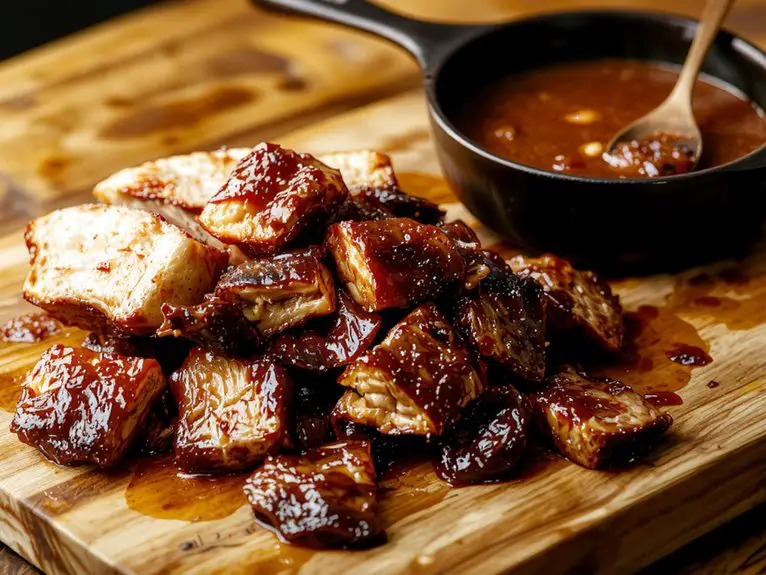
– Cube and sauce: Cut the brisket into 1-inch cubes and toss them with your favorite barbecue sauce.
Pro Tip: Warm the sauce for easier mixing.
Visual Cue: Each cube should be evenly coated with sauce.
– Finish cooking: Place the sauced cubes back in the smoker or oven for an additional 1-2 hours.
Why: This step caramelizes the sauce and intensifies the flavor.
Flexibility: Adjust cooking time based on desired crispiness.
– Serve and enjoy: Transfer the burnt ends to a serving dish and garnish with chopped parsley or chives for a fresh touch.
Pro Tip: Serve immediately for the best texture and flavor.
Visual Cue: The burnt ends should be sticky, shiny, and glazed to perfection.
Nutrition
Calories: 320 per serving
Protein: 24g
| Nutrient | Amount per serving |
|---|---|
| Calories | 320 |
| Total Fat | 18g |
| Saturated Fat | 7g |
| Cholesterol | 80mg |
| Sodium | 620mg |
| Carbohydrates | 12g |
| Fiber | 1g |
| Sugars | 10g |
| Protein | 24g |
Chef Tips
Though burnt ends are simple to make, a few chef tips can take them from good to great. I always use a well-marbled brisket point for maximum flavor.
Don’t rush the smoking—low and slow is key. Wrap in foil with butter and brown sugar for tenderness.
Finally, crisp them under high heat for that perfect bark. Trust me, it’s worth the effort.
Frequently Asked Questions
Can I Use Pork Instead of Beef?
You can absolutely use pork instead of beef for burnt ends—I’ve done it myself with pork belly or shoulder. Just adjust cooking times since pork fat renders differently. They’ll still be smoky, sweet, and delicious.
How Do I Store Leftover Burnt Ends?
I store leftover burnt ends in an airtight container in the fridge for up to 4 days. If I want them to last longer, I freeze them—they’ll stay good for 3 months. Just reheat before serving.
Can I Make Burnt Ends in an Oven?
I’d say you can make burnt ends in an oven—just slow-cook the brisket or pork belly first, then cube it, toss it in sauce, and finish it at a higher temp until caramelized. It’s not as smoky but still delicious.
What Sides Pair Well With Burnt Ends?
Creamy coleslaw cuts through the richness, while cornbread soaks up the sauce. I love pairing mine with baked beans for sweetness or crispy roasted potatoes for contrast. A simple green salad works too—just keep it fresh and light.
How Long Do Burnt Ends Stay Fresh?
Burnt ends stay fresh for about 3-4 days when refrigerated in an airtight container. If I freeze them, they’ll last up to 3 months, but I always reheat them gently to keep their flavor intact.