The Best Homemade Fried Apples Recipe
Recipe
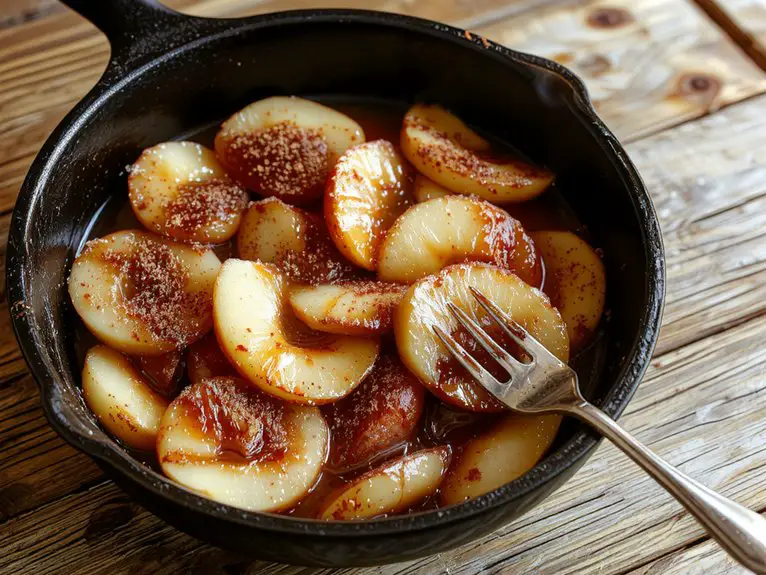
There’s something magical about homemade fried apples—it’s fall comfort in a bowl, and I promise, once you try this recipe, you’ll never go back to store-bought versions.
What makes it so special? It’s all about the simplicity: crisp, tart apples cooked just right with a touch of butter, brown sugar, and warm spices until they’re tender-caramelized perfection.
The secret? Using Granny Smith apples—they hold their shape beautifully and balance the sweetness perfectly. Trust me, the smell alone will have your kitchen feeling like a cozy autumn dream.
Whether you’re topping pancakes, pairing them with pork chops, or eating ‘em straight from the skillet, these fried apples are pure, nostalgic joy.
And guess what? They’re ridiculously easy to make—no fancy skills required. Let’s get cooking!
Ingredients
For the perfect batch of homemade fried apples, the right ingredients make all the difference. Using fresh, high-quality components guarantees a dish that’s bursting with flavor and texture.
While this recipe is simple, a few insider tips and substitutions can help you tailor it to your pantry or preferences. Here’s what you’ll need:
- Apples: Opt for firm, slightly tart varieties like Granny Smith or Honeycrisp. They hold their shape and balance the sweetness.
- Butter: Unsalted butter is ideal for controlling the saltiness, but salted butter works if that’s what you have.
- Sugar: White granulated sugar caramelizes beautifully, but brown sugar adds a deeper, molasses-like flavor.
- Cinnamon: Ground cinnamon is a must for that warm, cozy flavor. Freshly ground is a bonus.
- Nutmeg (optional): A pinch of ground nutmeg adds complexity, but it’s fine to skip if you don’t have it.
- Salt: Just a pinch enhances all the flavors—don’t leave it out.
- Lemon Juice (optional): A splash brightens the dish and balances the sweetness, but it’s not essential.
Pro Tip: For a richer flavor, try using clarified butter or ghee—it intensifies the caramelization without burning.
No cinnamon on hand? Pumpkin pie spice or apple pie spice can step in seamlessly. Stick to fresh apples for the best texture; frozen or pre-sliced apples can turn mushy when cooked.
How to Make the Best Fried Apples Preparation Steps
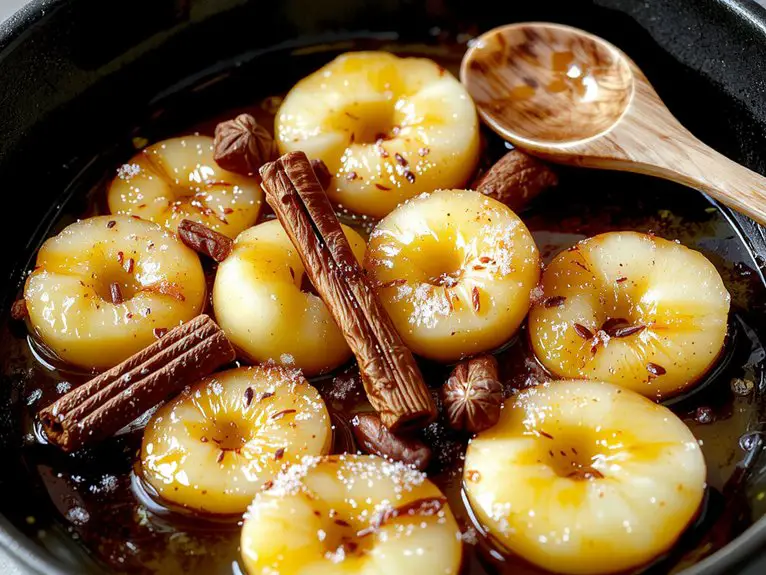
– Prepare your apples: Peel, core, and slice the apples into even ¼-inch thick slices. Uniform slices guarantee they cook evenly, preventing some pieces from turning mushy while others remain undercooked.
Pro tip: Use an apple slicer for faster, consistent results.
– Heat the skillet: Place a large skillet over medium heat and add butter. Let it melt completely but avoid browning it—this could give your apples a burnt flavor.
Watch-out: Too high heat can cause the butter to burn quickly.
– Add the sugar and spices: Once the butter has melted, sprinkle in brown sugar, cinnamon, and a pinch of nutmeg. Stir gently to combine.
The sugar will dissolve into a syrupy mixture, creating the perfect base for your apples.
Why: Brown sugar adds depth, while cinnamon and nutmeg enhance the warm, cozy flavor.
– Cook the apples: Add the apple slices to the skillet, tossing them gently to coat evenly with the syrup. Cook for 8-10 minutes, stirring occasionally, until the apples are tender but still hold their shape.
Visual cue: The apples should be soft enough to pierce with a fork but not mushy.
– Adjust the consistency: If you prefer a thicker syrup, let the mixture simmer for an additional 2-3 minutes.
For a thinner sauce, add a splash of apple juice or water.
Flexibility: Customize the texture to your liking!
– Serve warm: Transfer the fried apples to a serving dish and enjoy immediately.
Pro tip: Pair them with vanilla ice cream, pancakes, or oatmeal for a delicious treat.
Watch-out: Leaving them in the hot skillet too long can overcook the apples.
– Storage tips: Store leftovers in an airtight container in the fridge for up to 3 days. Reheat gently in the microwave or on the stovetop with a splash of water to revive the syrup.
Time-saving trick: Make a double batch for quick breakfasts or desserts throughout the week!
Nutrition
Fried apples are a delicious and comforting dish, but it’s important to be mindful of their nutritional content. Here’s a breakdown of the key nutrients per serving:
| Nutrient | Amount per Serving |
|---|---|
| Calories | 180 kcal |
| Total Fat | 8 g |
| Saturated Fat | 5 g |
| Cholesterol | 20 mg |
| Sodium | 10 mg |
| Total Carbs | 28 g |
| Dietary Fiber | 3 g |
| Sugars | 22 g |
| Protein | 1 g |
Chef Tips
Mastering fried apples is all about balancing flavors and textures. I always use a mix of tart and sweet apples for depth. Don’t overcook them—they should be tender but not mushy.
A pinch of salt enhances sweetness, and a splash of lemon juice adds brightness. Stir gently to avoid breaking the slices. Finally, let them rest a minute before serving; they’ll soak up the syrupy goodness perfectly.
Frequently Asked Questions
Can I Use Other Types of Apples for This Recipe?
Yes, you can use other types of apples. I often mix varieties like Granny Smith for tartness and Fuji for sweetness. Just avoid overly soft apples; they’ll turn mushy when cooked. Experiment to find your favorite combo!
How Long Do Fried Apples Stay Fresh?
Fried apples stay fresh in my fridge for about 3-4 days. I keep them in an airtight container to maintain their flavor and texture. If they smell off or look mushy, I toss ‘em.
Can I Make Fried Apples Without Butter?
Yes, you can make fried apples without butter—just swap it for oil, coconut oil, or even water for a lighter version. I’ve used olive oil before, and they still turn out sweet and tender. Adjust the heat to prevent sticking.
Are Fried Apples Gluten-Free?
Yes, fried apples are gluten-free if you don’t add any gluten-containing ingredients. I typically use apples, sugar, cinnamon, and oil or butter—none of those have gluten. Always check labels if you’re unsure about your spices or additives.
Can I Freeze Leftover Fried Apples?
Yes, I can freeze leftover fried apples. I’d let them cool completely, transfer them to an airtight container or freezer bag, and label with the date. They’ll keep for up to 3 months.